HP EliteBook 850 G5 G6 Battery Replacement Guide

By HP-BATTERY Updated on June 20, 2025

HP EliteBook 850 G5 G6 Battery Replacement Guide

The battery inside a laptop is the most crucial component for ensuring its normal operation. If the battery life of your HP Elitebook 850 G5 G6 is short, please refer to the following battery replacement guide. During the entire replacement process, be extremely cautious to avoid damaging the delicate electronic components inside the laptop.​

I. Preparation Before Replacement​

Tool Preparation: Phillips screwdriver ; Plastic pry bar ,New backup battery(Buy our EliteBook 850 G5 G6 laptop battery, we will give you a full set of installation tools)

Environmental Preparation: Choose a clean, tidy and stable desktop to avoid debris falling into the notebook during the replacement process. At the same time, please wash your hands to prevent static electricity or dust on your hands from damaging electronic components..​

Shut Down and Disconnect Power: Turn off the laptop and disconnect all external power sources, including the charger, USB devices, etc. Replacing the battery while the laptop is on or powered can cause a short circuit and damage the computer hardware.​

II. Replacement Steps​​

Step 1: Remove the Back Panel

  • 1. Flip the laptop over so that the bottom faces up.
  • 2. Locate the screws on the back panel. Use a Phillips screwdriver to carefully remove all the screws and keep them in a safe place to avoid loss.
  • HP EliteBook 850 G5 G6 Battery Replacement Guide

  • 3. After removing the screws, use the pry bar we provided to gently pry open the back panel along the gap. Be careful not to apply too much force to avoid damaging the back panel clips.
  • HP EliteBook 850 G5 G6 Battery Replacement Guide

  • 4. Once the back panel is loose, slowly remove it. At this point, the internal electronic components of the laptop will be fully exposed.
  • HP EliteBook 850 G5 G6 Battery Replacement Guide

Step 2: Remove the Battery

  • 1. After removing the back panel, you can clearly see the position of the battery.
  • 2. The battery is secured inside the laptop with screws. Use a screwdriver to remove the screws that fix the battery in place.
  • HP EliteBook 850 G5 G6 Battery Replacement Guide

  • 3. Disconnect the battery cable: The battery is connected to the laptop motherboard via a cable. Before removing the battery, you need to disconnect the cable first. Use tweezers or your fingers to carefully grasp the connector of the cable and gently pull it out. Do not pull on the cable itself to prevent it from breaking.
  • HP EliteBook 850 G5 G6 Battery Replacement Guide

  • 4. Remove the old battery: After disconnecting the cable, take out the old battery from the laptop.

Step 3: Install the New Battery

  • 1. Place the new battery in the original position, ensuring that the battery is properly installed and securely fixed. Use a screwdriver to tighten the fixing screws.
  • HP EliteBook 850 G5 G6 Battery Replacement Guide

  • 2. Connect the new battery: Connect the connector of the new battery cable to the corresponding port on the motherboard accurately, making sure the connector is firmly inserted to avoid poor contact.
  • 3. Power - on test: At this time, we can test whether the battery is installed correctly (to avoid having to disassemble the laptop again if the battery is found to be incorrectly installed after reinstalling the back panel). Connect the charger, then press the power button to turn on the laptop and check whether it can start normally. After entering the system, check the battery status to confirm that the new battery has been recognized by the computer and can charge and discharge normally.

Step 4: Install the Back Panel

HP EliteBook 850 G5 G6 Battery Replacement Guide

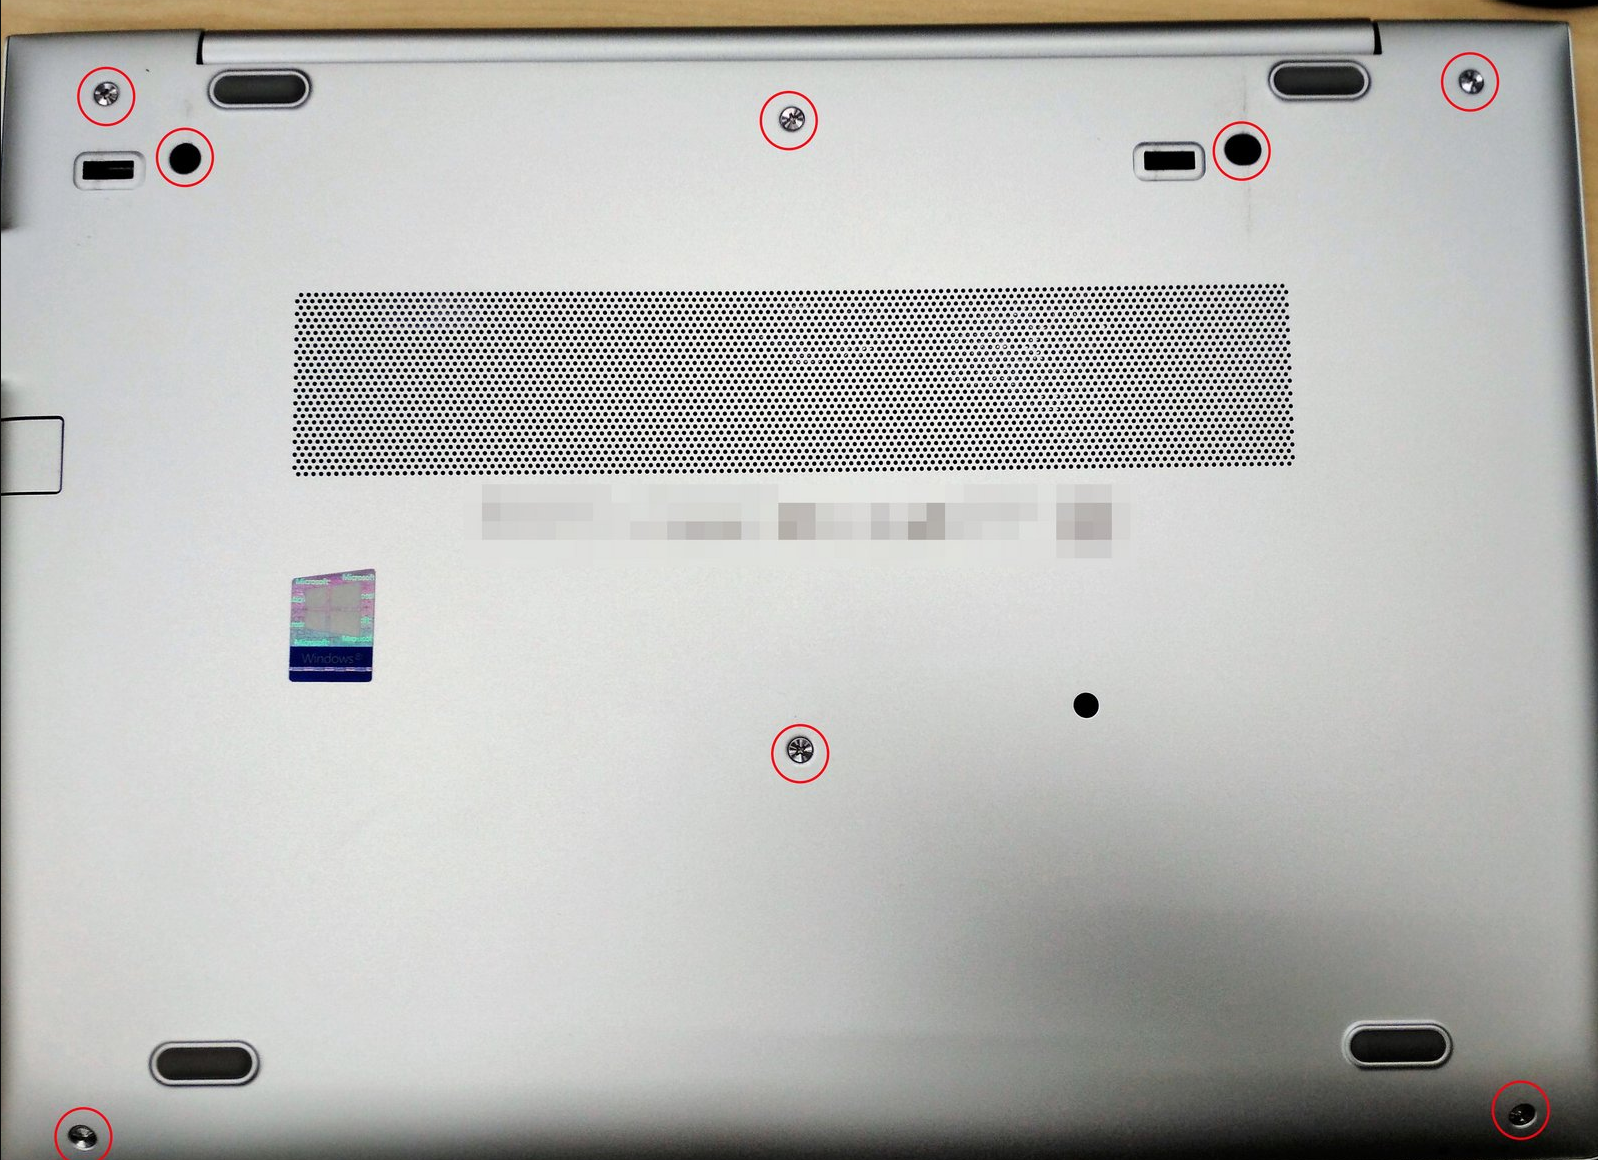
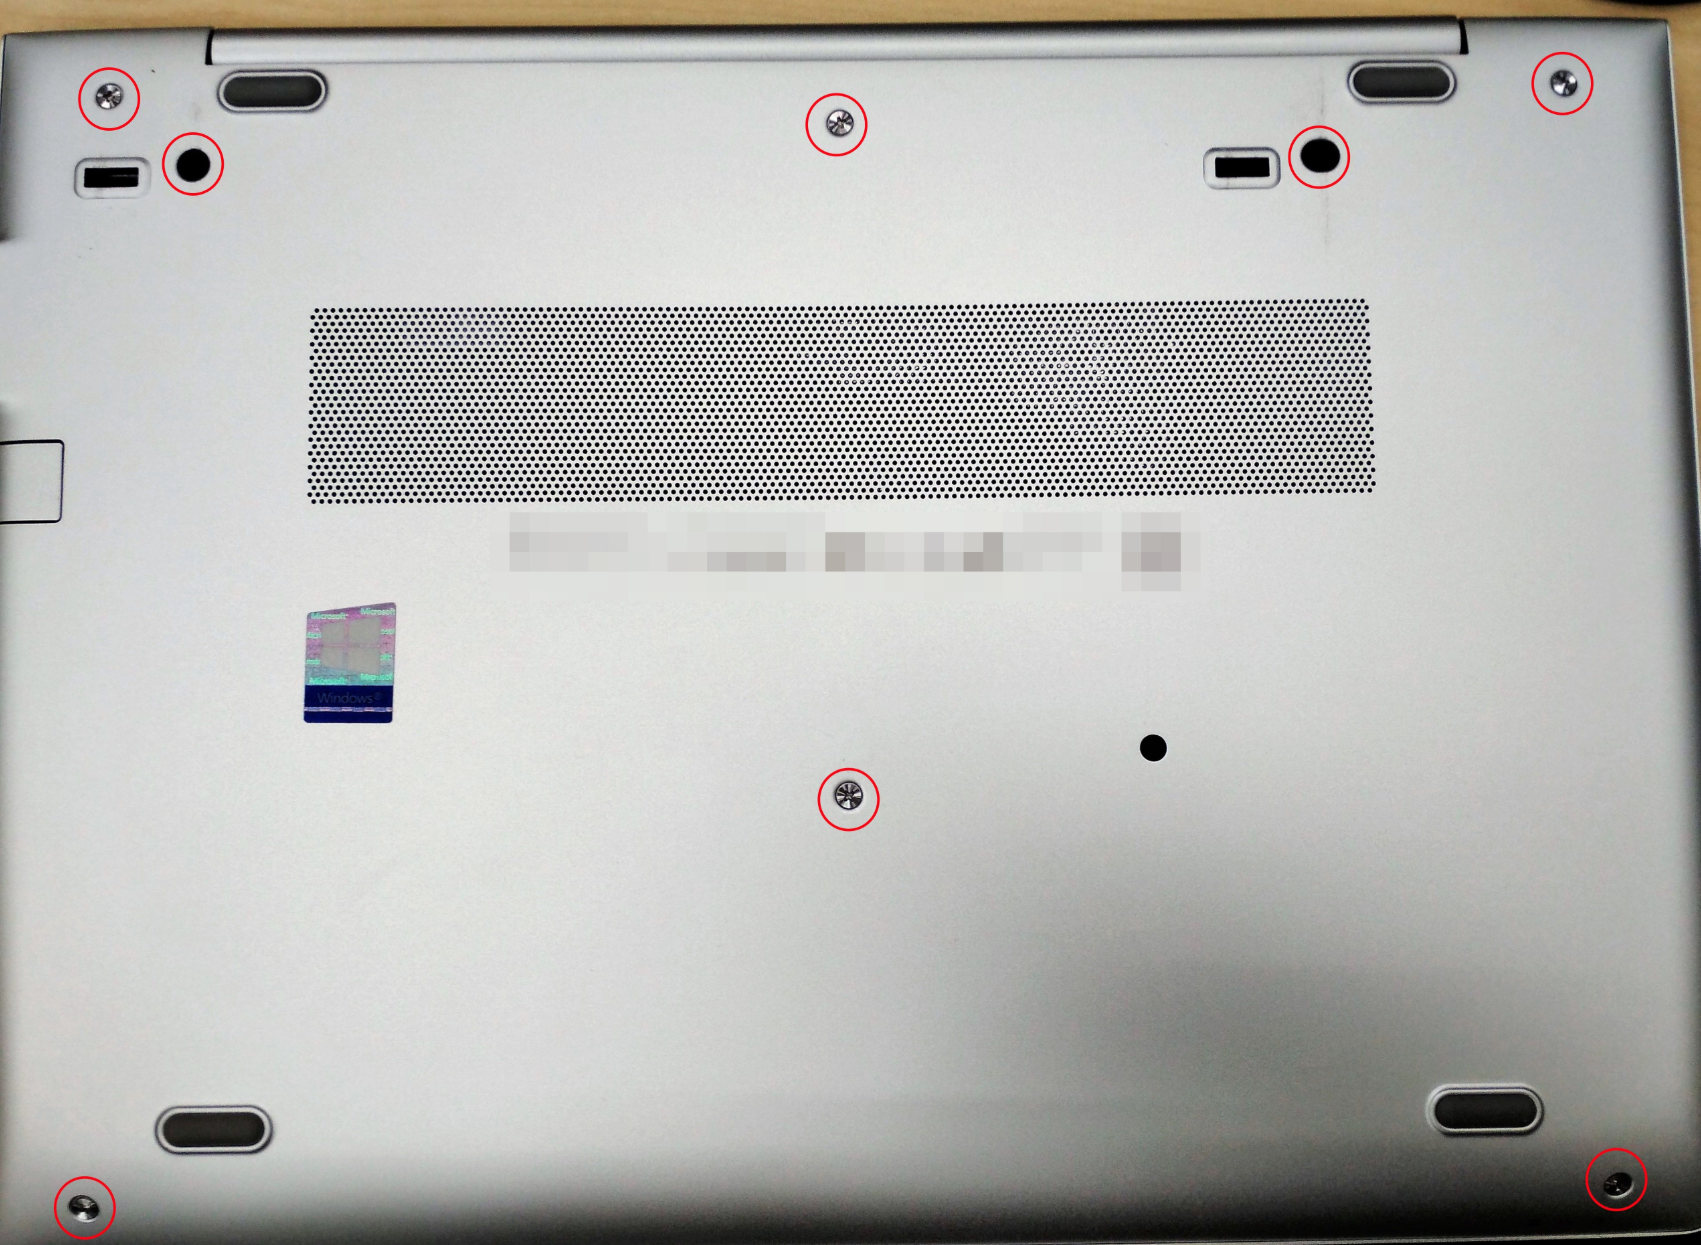
After confirming that the battery is installed correctly, put the back panel back on the laptop, align the clips and screw holes, and then use a screwdriver to tighten all the screws to secure the back panel.

III. Post - replacement Checks​​

Appearance Inspection: Check the appearance of the laptop to ensure that the back cover is installed smoothly, the screws are tightened, and there are no looseness or gaps.​ Boot Test: Connect the charger, then press the power button to turn on the laptop and check whether it can start normally. After entering the system, check the battery status to confirm that the new battery is recognized by the computer and can charge and discharge normally.​

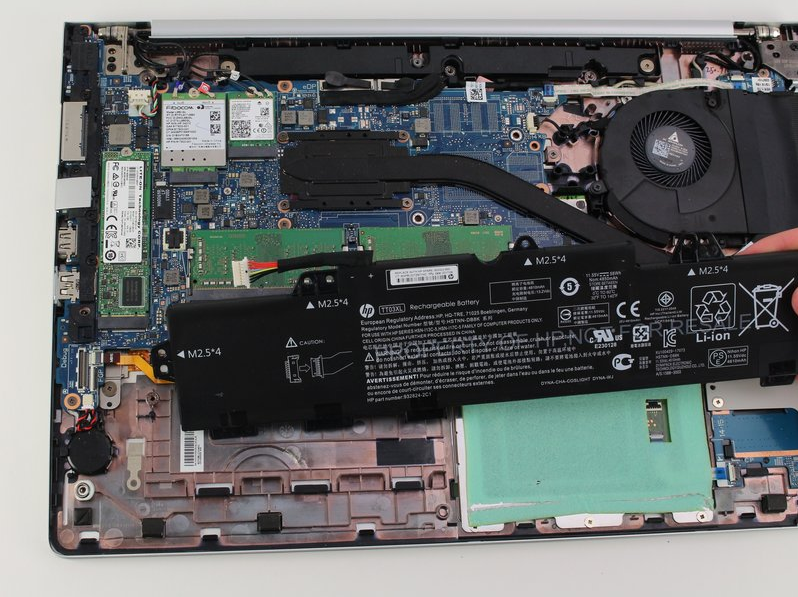
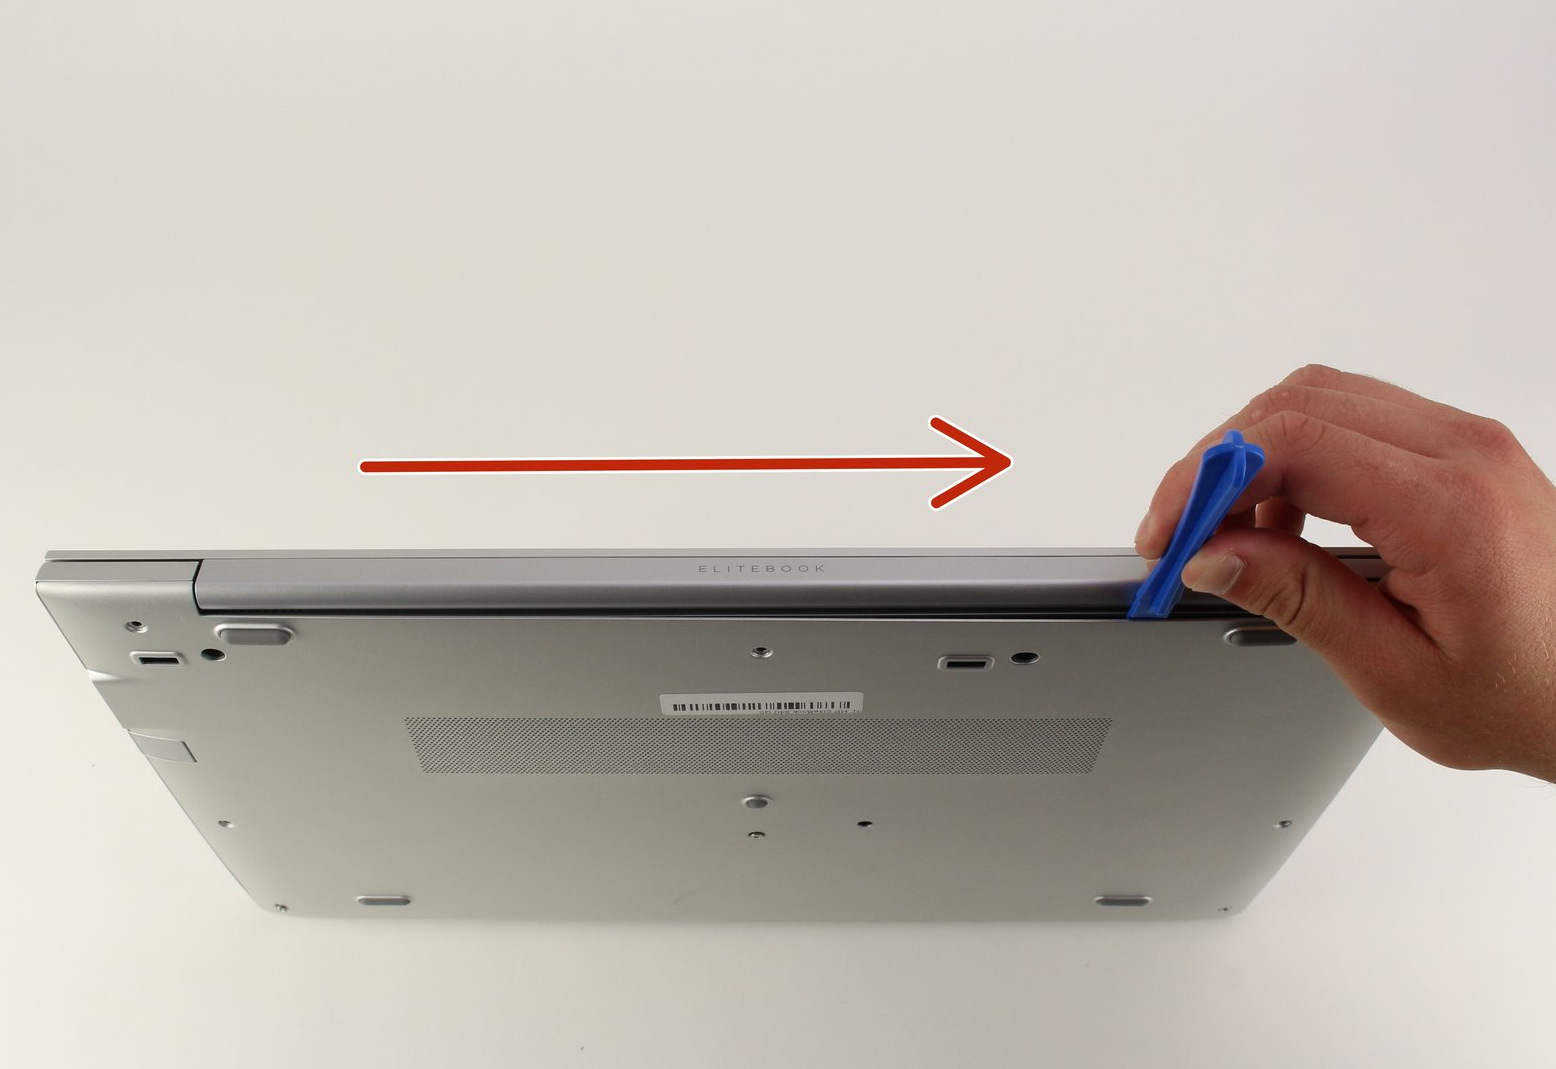
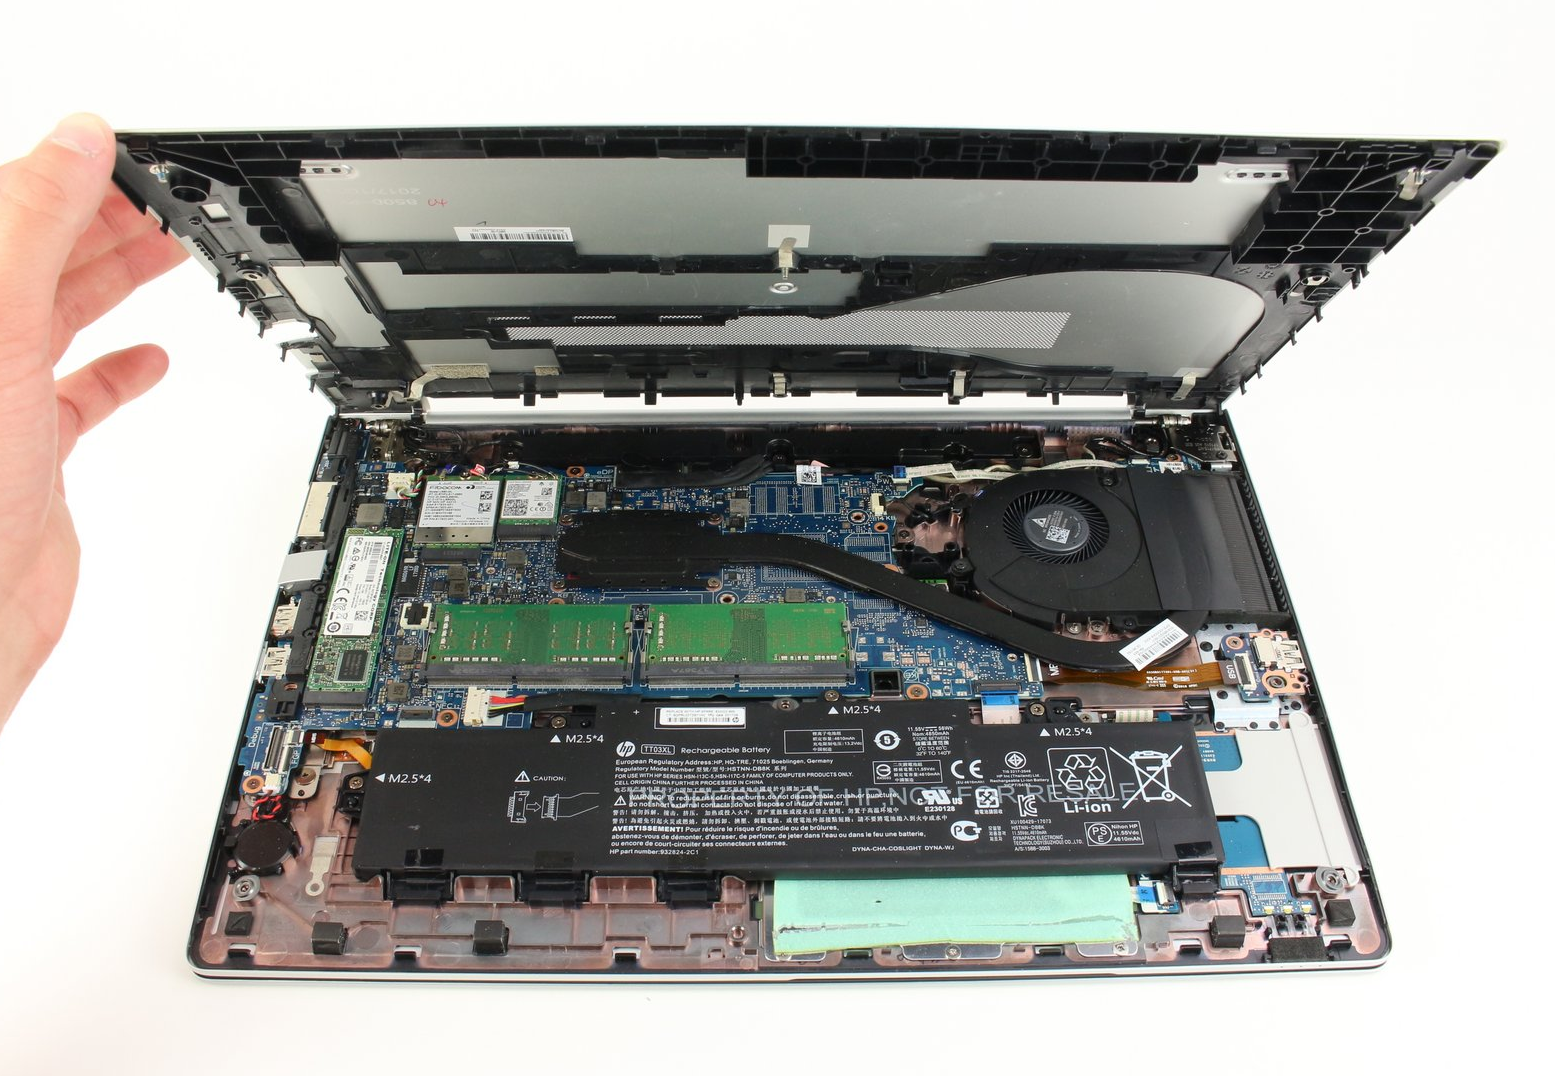
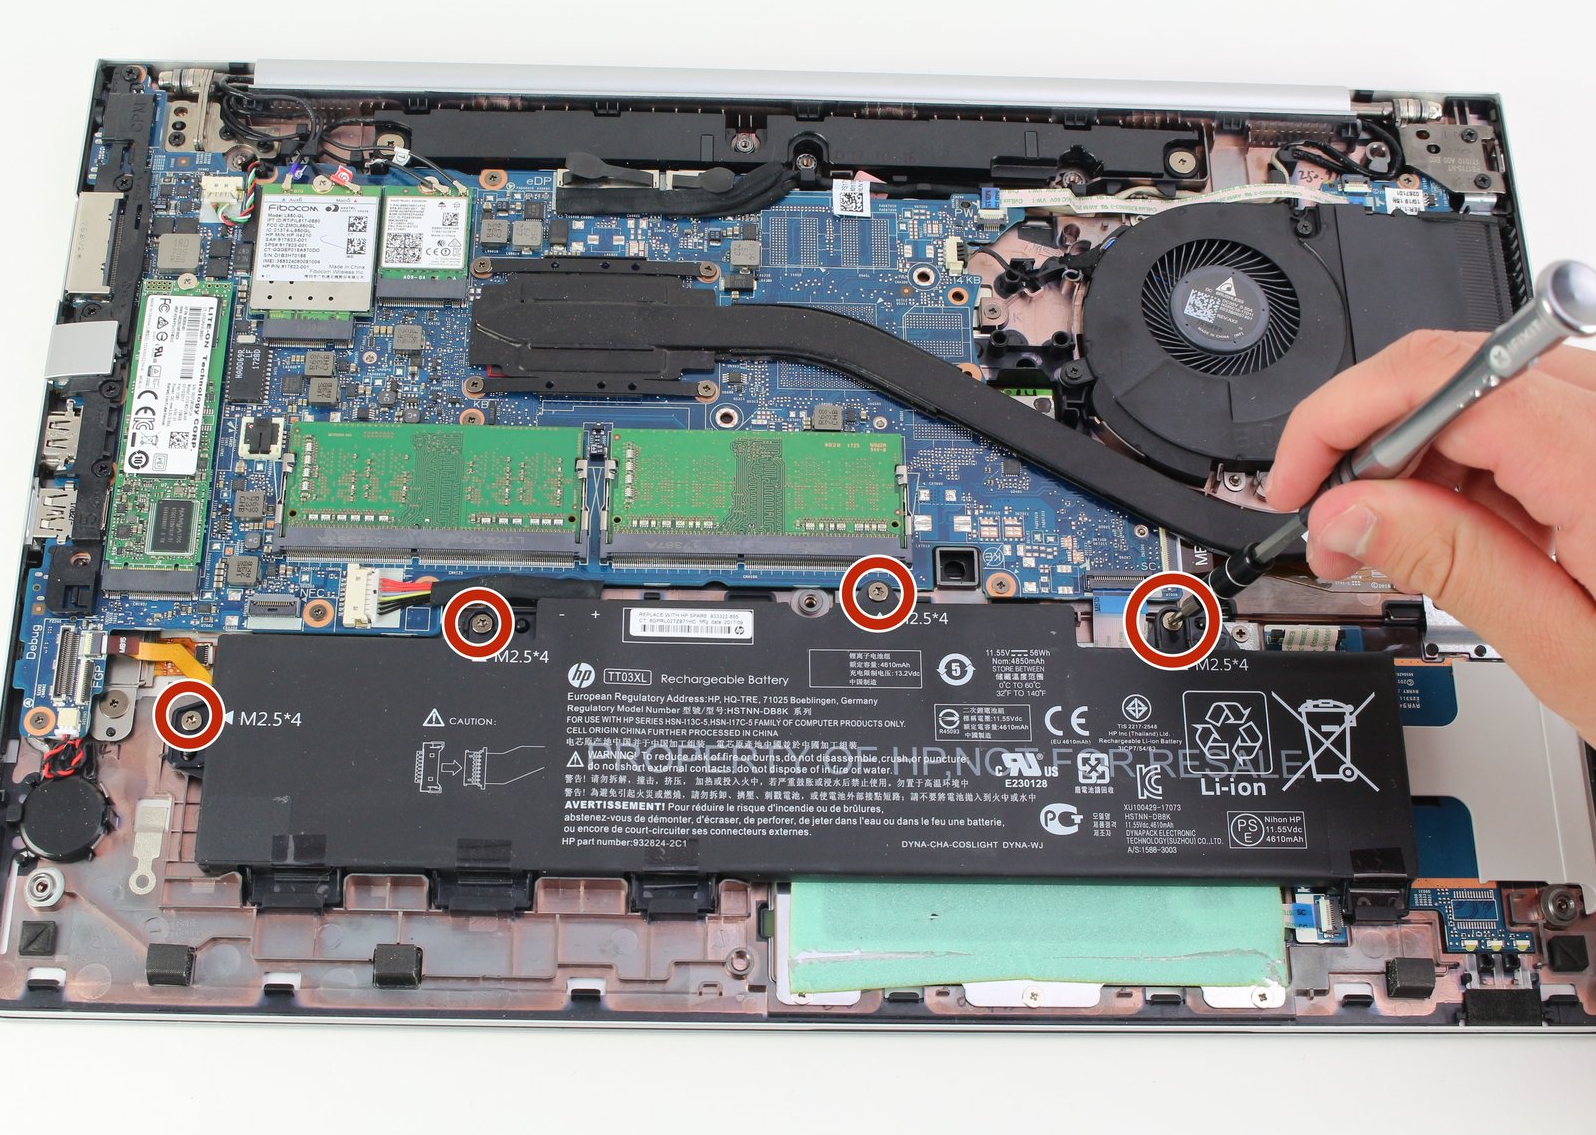
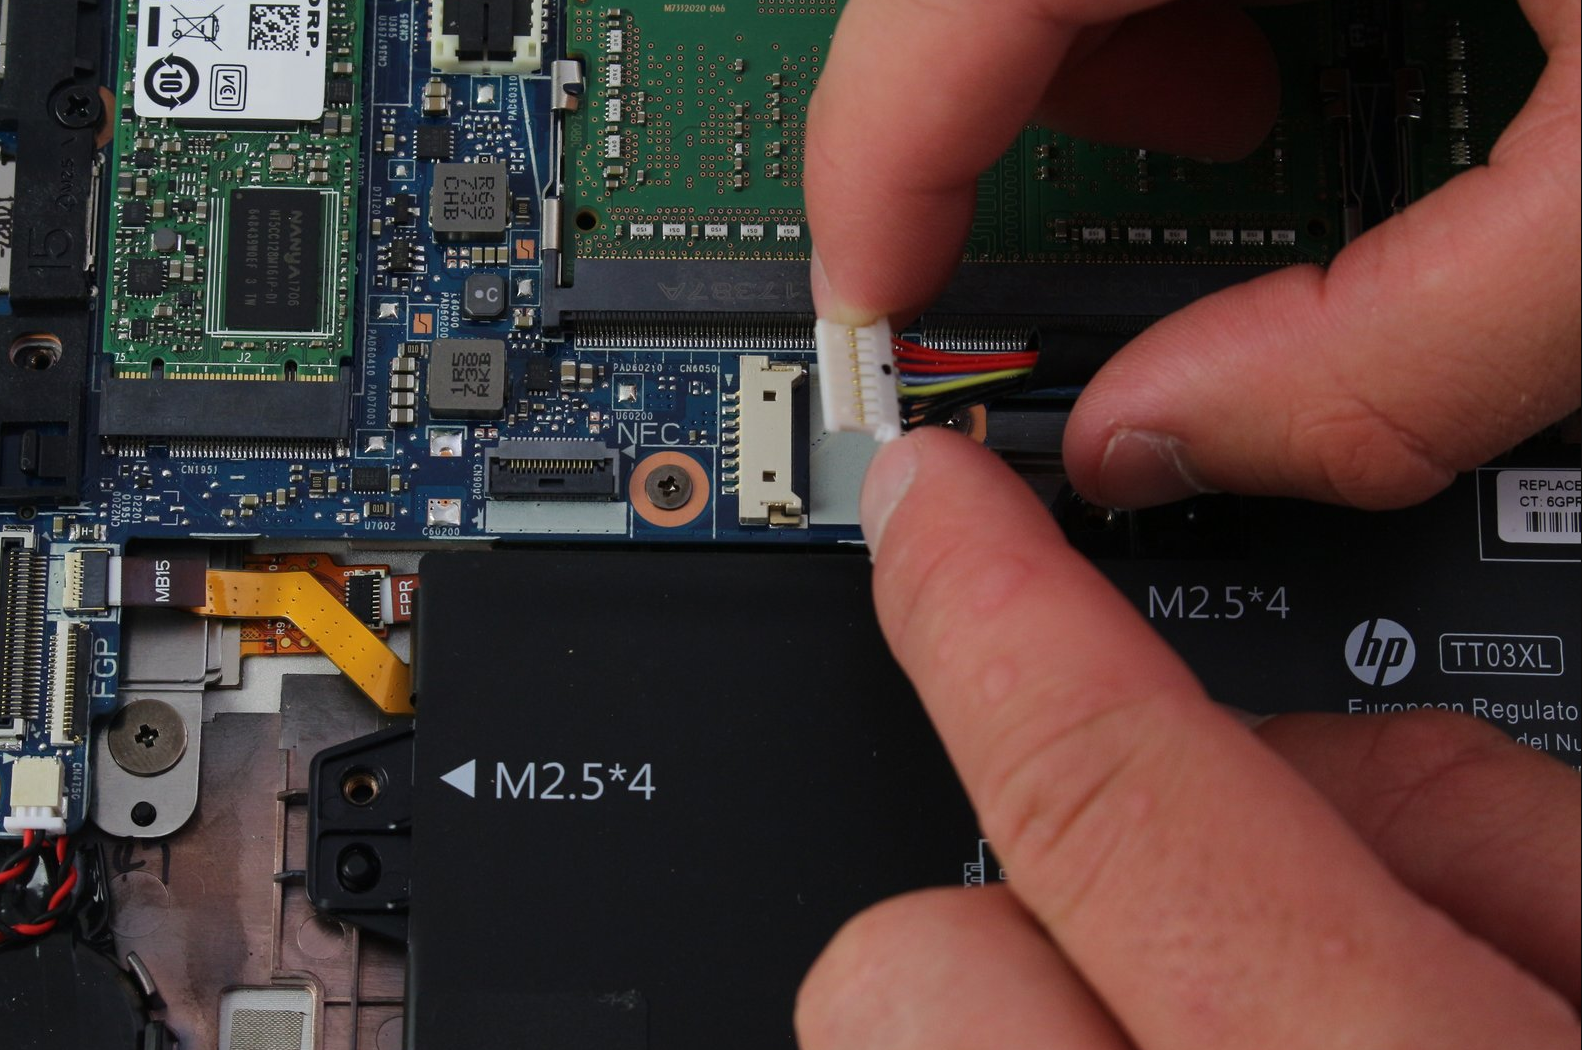
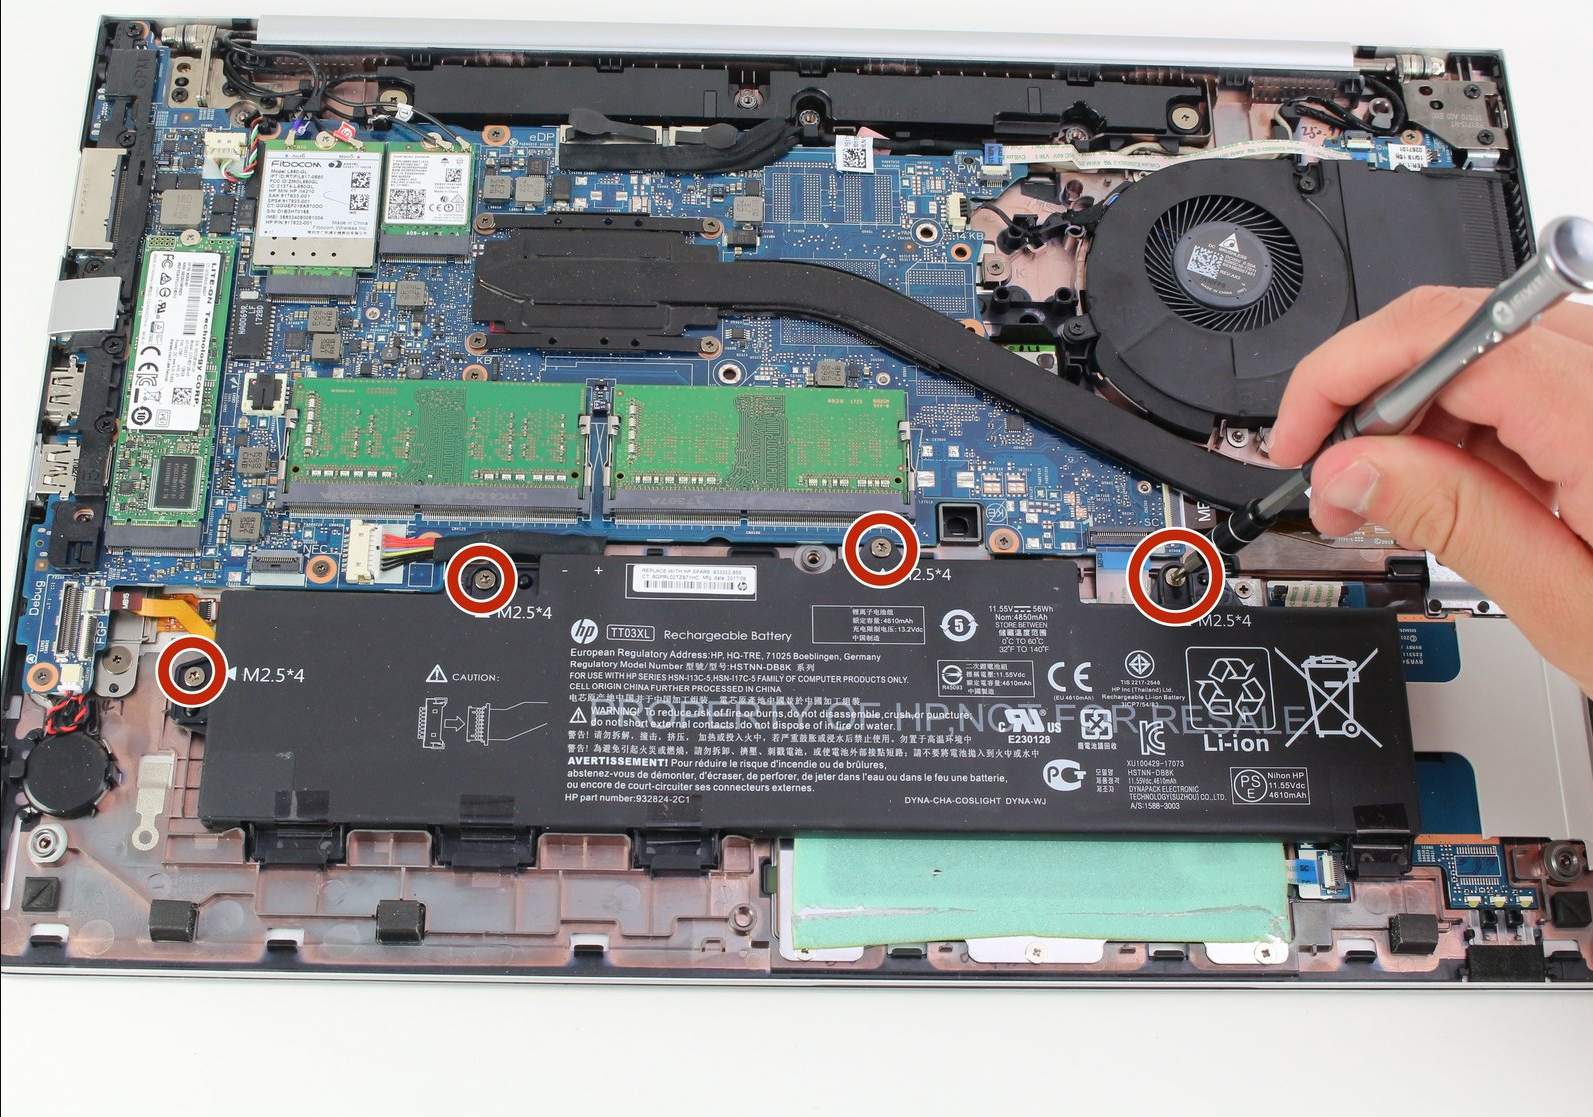
During the entire replacement process, since the back cover needs to be completely removed and the internal electronic components of the laptop will be exposed, be sure to operate with care. Especially when removing the cable connector, avoid pulling on the cable to prevent it from breaking, which may affect the normal use of the laptop. If you encounter any problems during the replacement process, it is recommended to contact a professional repair technician for assistance in a timely manner.​ This guide covers the entire process and key points of battery replacement. If you think certain parts need to be supplemented or have other modification suggestions, feel free to let me know.

If you want to learn more about HP-battery, please visit:https://www.hp-battery.com/faq.html